The most common ways for making thumbnails
September 12, 2024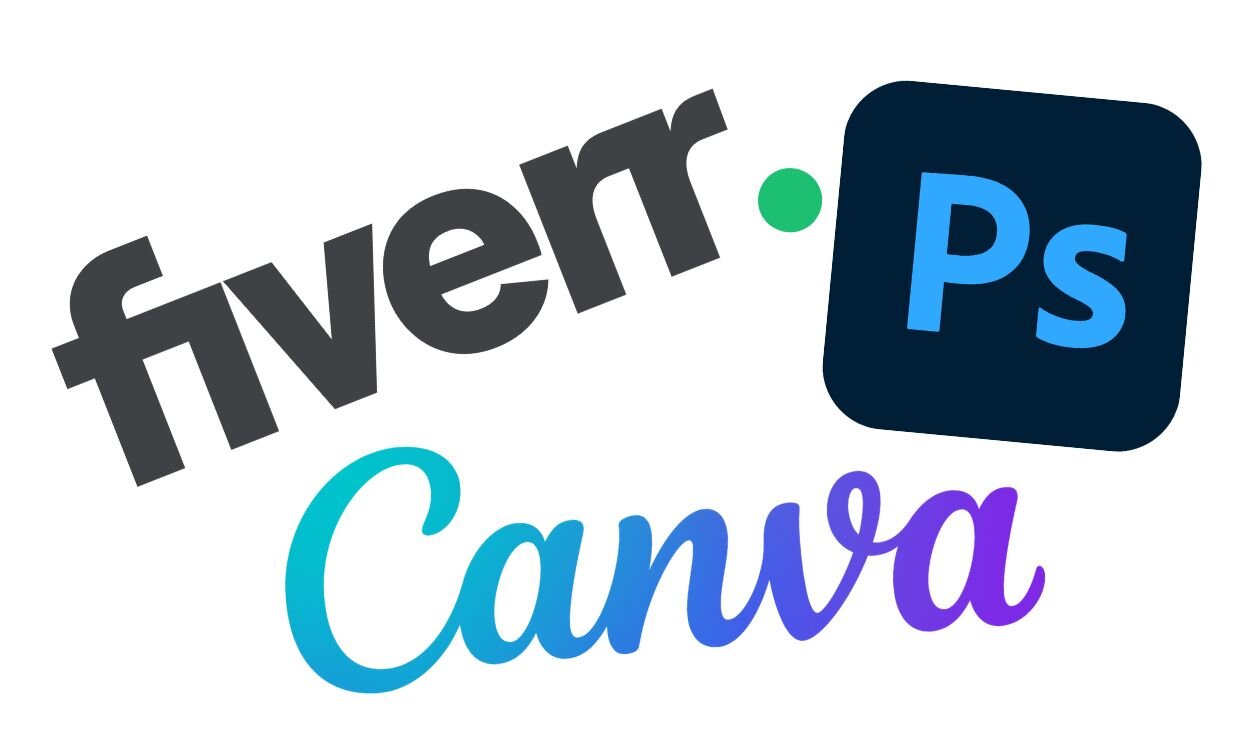
Creating eye-catching thumbnails is one of the key factors in succeeding on YouTube. Why? Because along with the video title, the thumbnail is the first impression that grabs a viewer's attention. By tapping into this "curiosity gap" with a well-designed thumbnail, you can significantly boost your video views (read here for other success factors). That's why it's worth investing time in optimising your thumbnail creation process. In this article, we'll explore and evaluate the four most common ways YouTubers create their thumbnails.
The easy way - Just take a frame!
The quickest and most accessible option is to simply use an existing frame from your video, either directly from YouTube’s thumbnail suggestion or manually selecting one yourself. This method is fast, easy, and requires no additional tools or expertise. In general however, it is not recommended to do as we will see later in the post.
Pros:
- Speed and convenience: It’s the simplest method, requiring almost no extra effort. This can save time, especially if you're producing content regularly.
- Authenticity and consistency: Since the thumbnail image is part of the video itself, to some viewers this can feel more consistent. It sets an honest expectation, ensuring that what’s promised visually in the thumbnail is delivered in the video, preventing any misleading impressions.
Cons:
- Customisation limits: You’re limited to whatever your video has already captured. Almost always this leads to lower-quality thumbnails, especially if no "ideal" frame is available.
- Missed opportunity: A random or unremarkable frame does not fully engage potential viewers, missing the chance to craft a thumbnail that sparks curiosity.
Professionalise with photo editors
When looking at the best performing videos in your niche using a tool like the outlier database from glowAI, you will likely recognise that nearly all of them don't simply use a video frame as thumbnail but instead a customised image created in some kind of Photo Editor. The reason for that is quite simple: Editors allow you to fully customise your image by applying a specific thumbnail style like a split-face, combining multiple eye-catching elements or using image effects. In addition, you can build your channel identity by reusing patterns in your Editor and thus harmonising your thumbnail designs. A good example for this is the YouTuber Niklas Christl who managed to build a successful channel identity by using harmonised thumbnail designs with Photoshop:

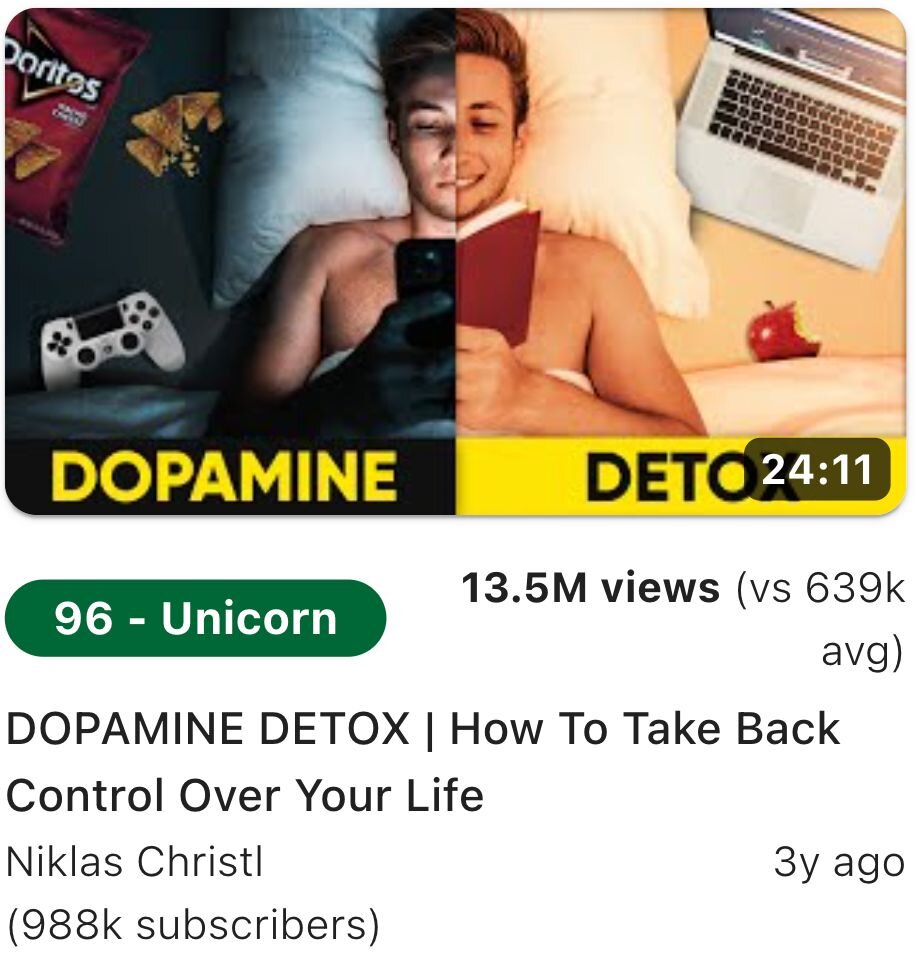
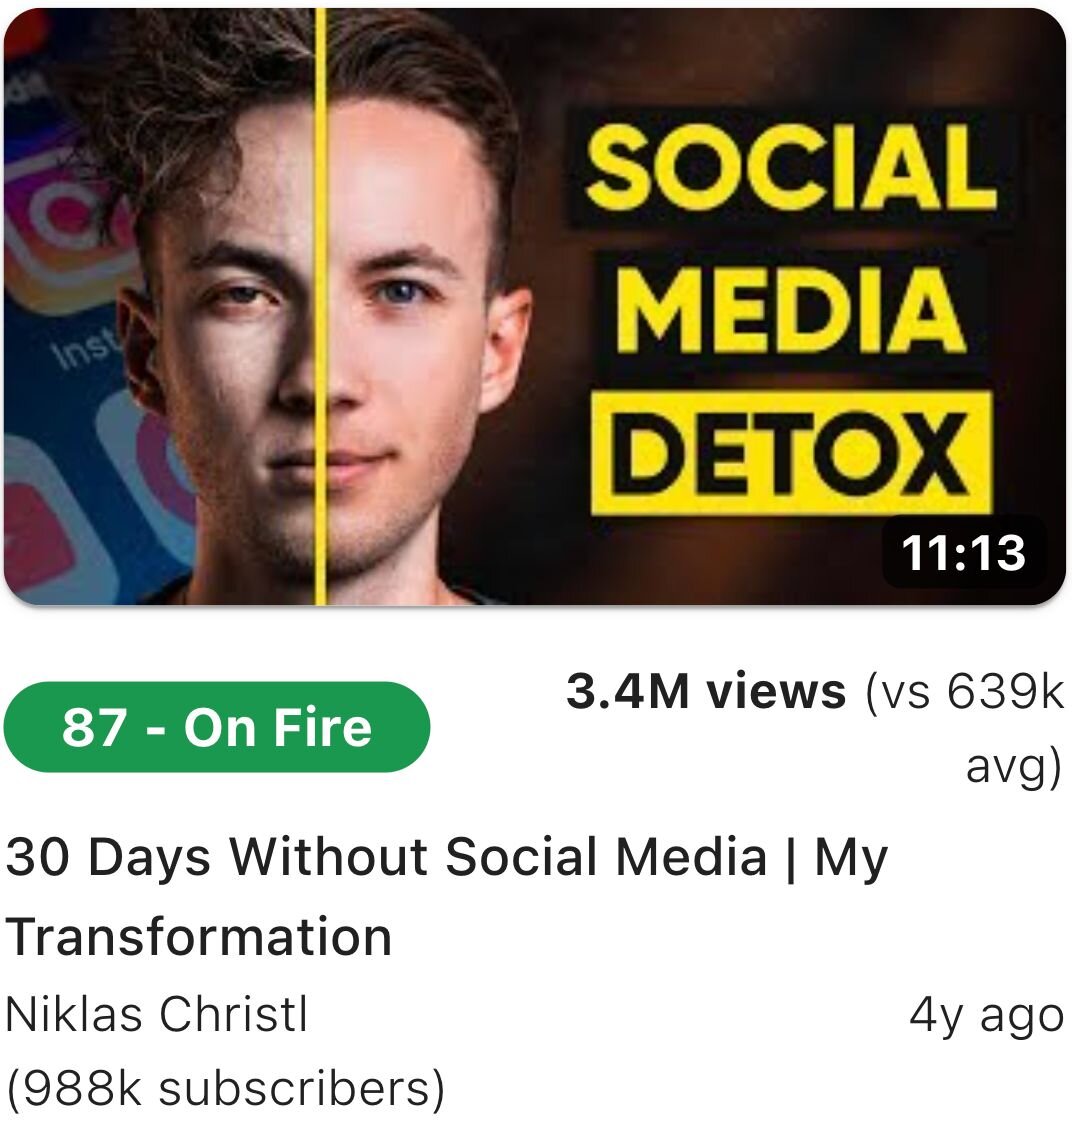
By the way, if you're interested what that "Unicorn" and "On Fire" Scores mean in the images above, look here.
Let's summarise the Pros and Cons of using Photo Editing software when creating a thumbnail:
Pros:
- High-quality output: You can create visually appealing thumbnails that match the theme of your video and channel brand identity. Furthermore, you can enrich the thumbnail with viral elements to help boosting your video. In fact, many successful YouTubers plan their thumbnails in advance, often staging specific "viral" shots during filming to ensure the thumbnail is as compelling and cohesive as the video itself. This proactive strategy maximises both visual impact and viewer engagement.
- Creative freedom: The tools available in Photoshop, Canva or similar software allow for virtually unlimited customisation, letting you experiment with styles, text, and overlays to stand out in your niche.
Cons:
- Costs time and money: Crafting a professional-grade thumbnail from scratch takes time and skill, which may not be ideal for creators on a tight schedule. In addition, some of the tools cost (heavy) money, especially if you want to dig deeper by having more professional features. If you are on a low budget, we recommend Canva as it comes with a lot of useful editing features for free.
- Learning curve: Every photo editing tool comes with its own learning curve. While Canva is highly beginner-friendly and offers intuitive drag-and-drop features, advanced tools from Adobe (like Photoshop or Illustrator) require a more substantial time investment to master. These professional tools offer greater creative control and precision, but they can be overwhelming for newcomers. However, persistence pays off - there are countless tutorials and online courses available to help you improve your Photo Editing skills over time.
Let others do the job!
For those who want to have engaging thumbnails without the time or skill investment, outsourcing the creation process to a designer or artist is another viable option. Platforms like Fiverr, Upwork or YT Jobs can connect you with hundreds of (semi-) professionals who specialise in YouTube thumbnails. But be aware as there are some Cons with this method as well.
Pros:
- Professional quality: You get the expertise of someone whose job is to craft visuals that capture attention. The result can be a well-thought and polished thumbnail that reflects your video’s content better than a single frame or your Photoshop skills would do.
- Can be time-saving: Generally speaking, outsourcing can free up your time to focus on content creation, leaving the thumbnail design work to someone else.
Cons:
- Cost: Hiring a professional, especially for every video, can become expensive over time, especially for new or smaller channels with a tight budget. Be aware that prices vary a lot, from just five Bucks to over 300 USD (depending on the experience of the thumbnail artist and the number of variations you want).
- Varying quality: Not all freelancers will deliver the same level of quality. You might need to try a few different designers before finding someone who understands your ideas and regularly delivers thumbnails that meet your expectations.
- Don't underestimate the required time: Working with freelancers may involve waiting times, revisions or miscommunication that can heavily delay your next project. Be aware that sourcing the work out is not always a time-saver.
Ever heard of stable diffusion?
In recent years, AI-powered tools for creative tasks have become more advanced, and generating YouTube thumbnails is no exception. Wether using AI within your Photo Editor (Canva has some nice features) or experimenting with so called Generative AI Models like Stable Diffusion or Midjourney on your own, the options are endless and a first image is built within seconds. In fact, even big YouTube Channels already use AI generated thumbnails for their content. But this can have downsides too, just look at the following two AI generated thumbnails of a Dude Perfect Video that was published a few months ago:
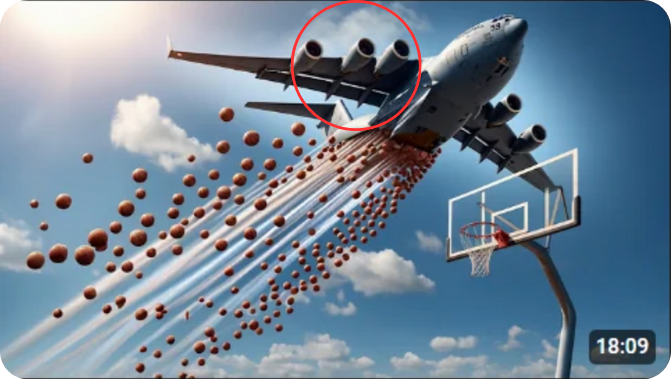
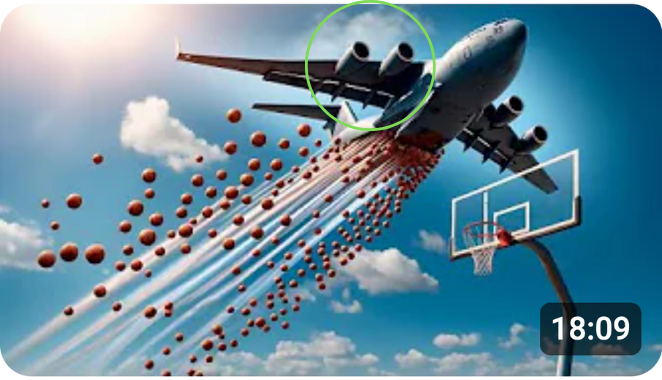
Notice something off? First, you see the original thumbnail that was generated wit AI. But since when do C17 Freighter Planes have three engines on the right and only two on the left? When Dude Perfect realised, they quickly adapted and uploaded a new thumbnail version, still being created with AI but this time being physically correct.
Pros:
- Efficiency: AI can quickly generate thumbnails, giving you multiple design options with minimal effort.
- Affordable: AI tools are often more cost-effective than hiring a professional designer, and some free tools can still provide decent results.
Cons:
- Limited customization: AI-generated thumbnails may not always capture the nuance or emotion you’d get with manual design. They can sometimes look generic or overly automated.
- Quality variation: The results can be hit or miss. While some AI tools already produce great work, others may struggle with creating designs that match your unique style or audience’s preferences.
Because of the massive potential for creating high-quality AI-generated thumbnails, we at glowAI are developing a Thumbnail Ideation and Creation Suite that learns from the most successful videos out there and combines the efficiency of Generative AI with the customisation options creators need. Our tool aims to deliver the best of both worlds—quick, AI-driven thumbnails with publishable quality that still offer you full creative control. If you’re interested in staying up to date with our progress, follow us on social media for the latest updates!